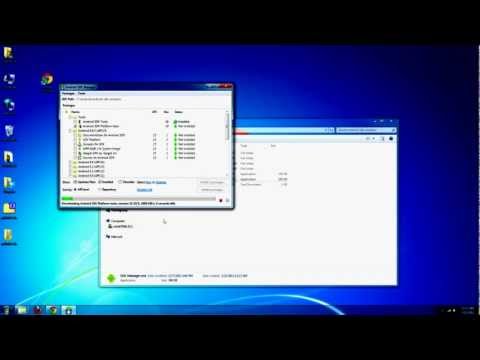
Hello, I'm ft and John. Today, I'll show you how to set up the ADB for Windows, also known as the Android Debug Bridge. This guide is to help those who are first-time trying to root an Android phone or tablet and need to use the ADB. First, I need you to open up your web browser. I currently have it linked but for developer.android.com/SDK/index.HTML. Once you're there, you're going to need to download the Android SDK Windows zip file. Preferably, save it to an easy spot, such as the desktop, for easy access. While we're waiting for the download to complete, go ahead and unzip the file. Then, I want you to go to the start menu and go to computer. There, you'll find the C Drive. Create a new folder named Android, or you can name it anything else, but just to keep things simple, name it Android. Open the newly created Android folder and open the unzipped folder. You'll want to copy the contents of this folder into your new Android folder. Go ahead, go into the folder and open the SDK manager. Inside the SDK manager, you'll see a long list of different things you can download for accessing programming Android. If you just want to use the ADB, the only thing you need to make sure is clicked and checked is the Platform Tools. Make sure you have that checked, then hit install. Not necessary, but again, for the USB driver, I recommend installing it. Once the installation is complete, close the SDK manager. Now, go ahead and open up your new folder "Platform Tools." You'll see that you have adb there. Just to make sure that everything's fine, go to the start menu, type in CMD, and click on the CMD.exe, also known as Command Prompt. In the Command Prompt,...
Award-winning PDF software


Video instructions and help with filling out and completing Are Form 2220 Depreciated