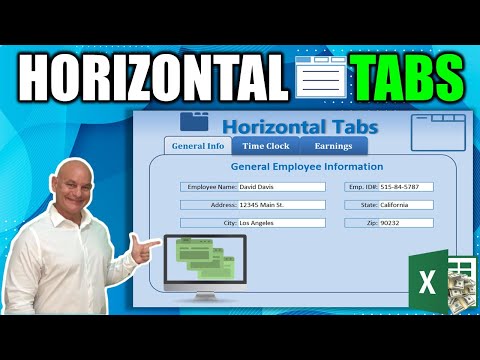
Hello, this is Randy with Excel for freelancers. Today, we're going to show you this amazing trick of using horizontal tabs within an Excel worksheet. It's a great way to display lots of data in a small area. Alrighty, let's get started. I've got my horizontal tabs worksheet open here and as you can see, it's been divided up into three sections. I've got general employee information, some time clocking history detail, and an earnings history table. So, I've got these three sections and basically the idea is what we want to do for the tabs is to create tabs that display the sections individually. Alright, so here's how we're going to do that. First, we'll add the shapes. To do that, we'll go into insert, then shapes, and choose the same side corner rectangle. We'll put that out here and make it a little bit longer. Now, we want to duplicate that five more times, so we'll use control D to create six of these tabs. Next, we want to differentiate them into two different sets of three. To do that, we'll use the select objects tool. If you don't have this tool in your quick access toolbar, I recommend you add it. You can do this by going into more commands, selecting all commands, and locating the select objects tool. Once you find it, click and add it. Then, you can select three tabs and move them over to separate them. Just make sure to unclick the select objects tool when you want to go back to working mode. Now that we've differentiated the three tabs, we can select three of them and change their look. To do that, we can go to format or right-click and format the objects. We can choose a gradient fill and go...
Award-winning PDF software


Video instructions and help with filling out and completing Are Form 2220 User